How to Open a Top Bar Hive
On this page, I show some typical colony inspections and routine seasonal manipulations with pictures that complement the book. First a few preliminaries.
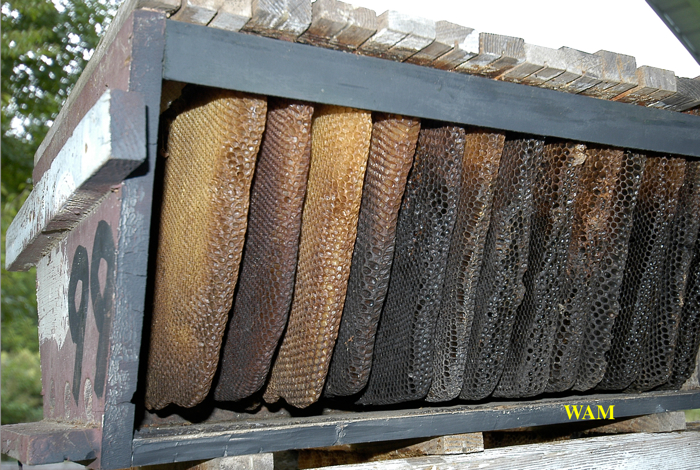
The combs of a top-bar hive are arranged in a row like slices of bread in a loaf as shown in the hive below. The beekeeper can open the hive from either end and look through the combs, but you cannot pull up a comb in the middle of the hive first without working your way to it. By the way, good old hive 99 shown below was built in the late 1980’s and spent about ten years in the fields of North Carolina where her bees pollinated cucumbers, watermelons, and cantaloupes, then went on to do other service in my bee operation. Now I am using number 99 as a demonstration hive.
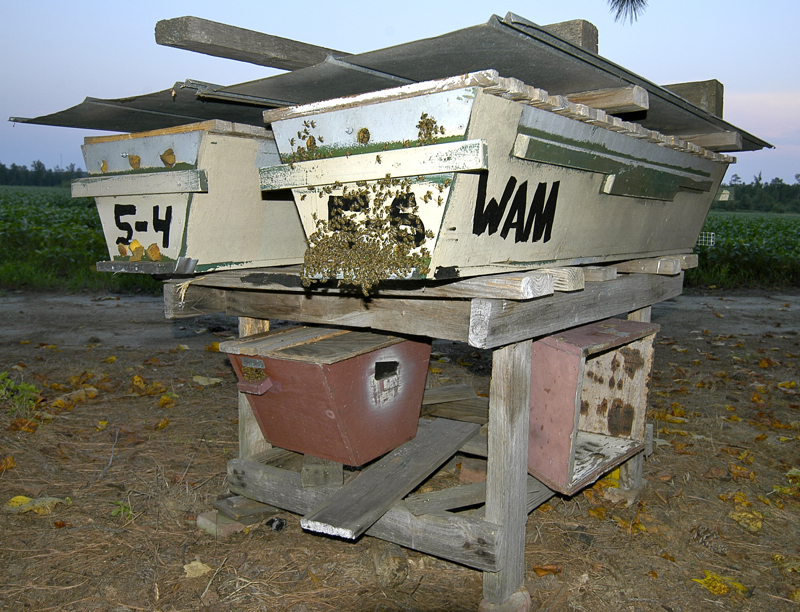
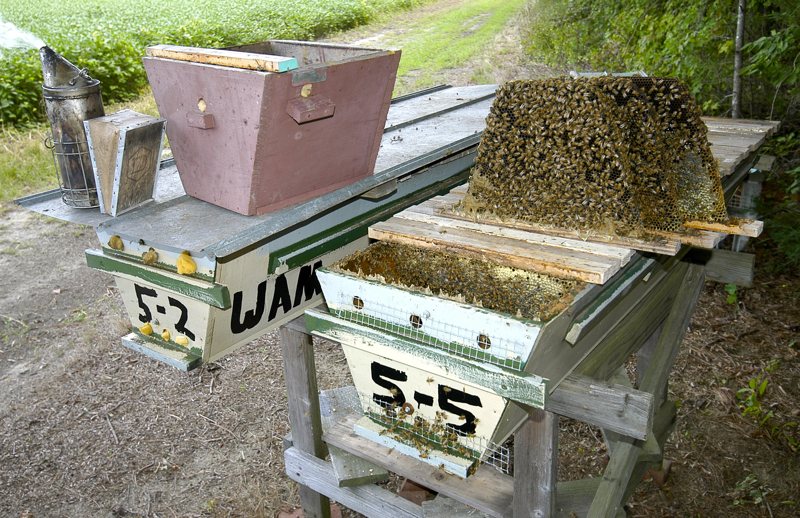
Below is a pair of hives on a stand. The stand is at a comfortable working height for me. Other beekeepers can build stands to their heights, keeping in mind the stands rest on bricks. I made most of these stands in the late 1980’s out of scrap wood and nails spilled on the floor of the hardware stores and sold at a discount. I build my equipment, hives included, to last 20 years or more, which is another way to lower costs. The metal covers shelter everything below giving long life to the wood.
The stand also provides storage room under the large hives. Here we have a one-foot nuc housing a spare queen (the little red hive to the left). That hive does not need a metal cover since it is already sheltered. Out in an apiary, far from home, a spare queen is the perfect solution upon finding a large queenless colony or one with a failing queen. I make these nucs up in the spring with the very detailed procedures given in my book, and of course especially for top-bar hives. Some nucs I leave in the out-apiaries, others I use to start colonies, and still others are for mating queens (see below). The empty nuc box, also under the hives, is for colony inspections as we will see.
Because of a past experiment, the bees fly from the pair of hives in opposite directions. Usually I have the open entrances in the same direction. The large hive on the right has its entrances open on this side with bees on the front of the hive. The other hive (on the left) has its flight entrances open on the other side out of view. In full view on the left hive are its rear entrances blocked with bits of sponges. I cut a complete set of entrances in each end on most longer hives (there are a few technical exceptions for scientific research). The reasons for two sets of entrances are described in the book, but one reason is, interestingly enough, to reduce repainting the hives.
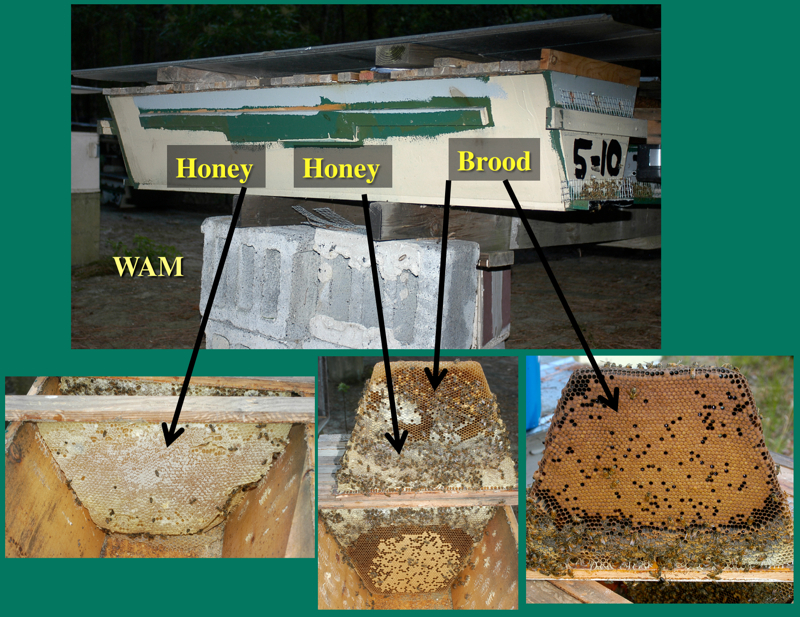
With top-bar hives, the entrance location sets the placement of the brood and honey. I place my entrances at the end of the hive. The bees put the brood nest close to the entrances with most of the honey to the rear of the hive as diagrammed below. This arrangement, the brood nest next to the entrances, allows extremely efficient colony inspections. For example, even in the main nectar flow when hive weights are very heavy, I can open the hive at the front and go right in the brood nest without lifting the honey. The transition from brood to honey can be variable so I use a queen excluder to set the maximum size of the of the brood nest. Solid honeycombs do not always act as a queen barrier. My book details the construction and use of queen excluders in top-bar hives.
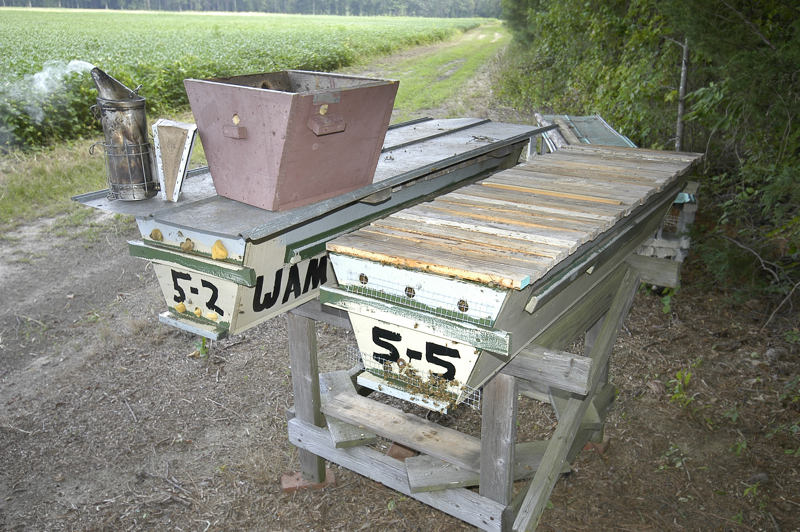
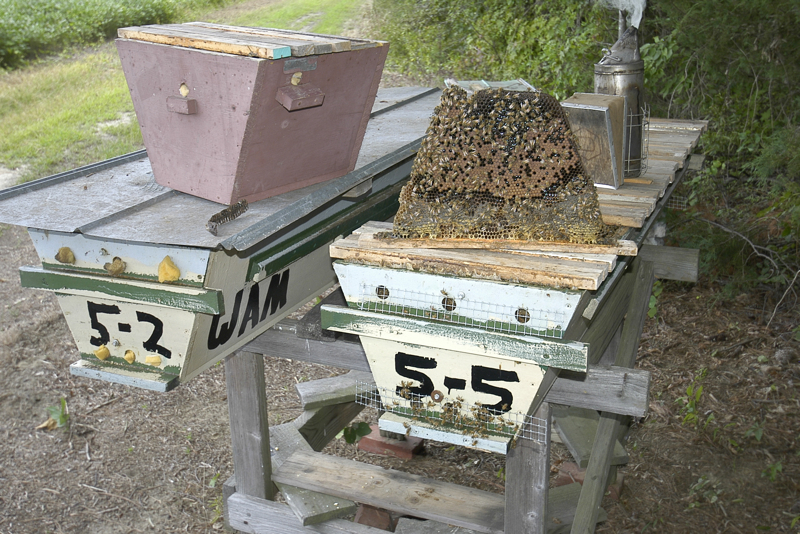
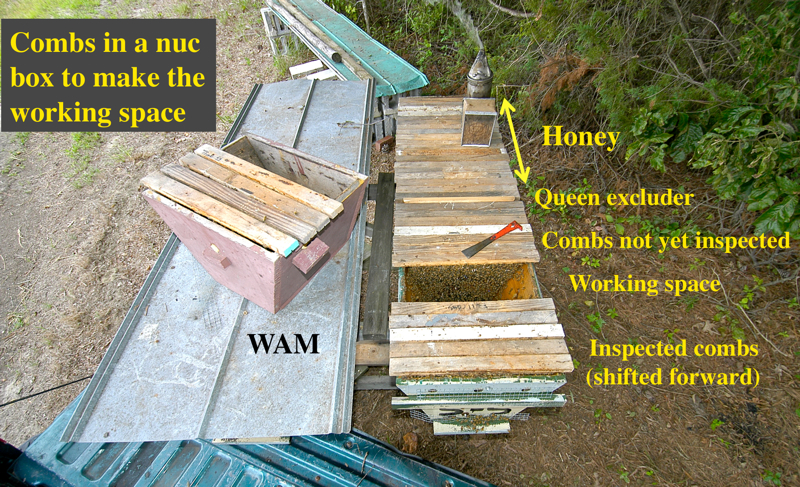
With the metal cover off the hive, we are ready to open it starting with the first top bar next to the entrances. Beside the hive is an empty nuc box to hold some of the first-removed top-bar combs. There is also bee a smoker. I always have a smoker at the ready when inspecting colonies. (One needs to learn how to keep it lit and how to use a minimum of smoke to keep the bees calm while looking through the hive. A veteran beekeeper can give those instructions.)
After a couple of small puffs of smoke, I have removed some top-bar combs and placed them upside-down to show the bee coverage. Subtle things are working here to make the bee work easier. The entrance holes do far more than just let the bees go in and out. With top-bar hive beekeeping, one becomes much more intimate with the comb building habits of bees since there are no sheets of foundation forcing the bees from their natural instincts. Unless the hive becomes crowded, bees refrain from building comb near entrances, a little-known fact. So the first top bar typically has a small comb and is easy to remove. The result: the entrances also let the beekeeper in the hive. If the first comb gets too big, I just move it to the back of the hive or use it to make up another colony. Furthermore, the entrances are mounting ports for other equipment like “plug on” syrup feeders, where one can feed a strong colony without opening the hive. And the entrances along with the alighting board serve to attach a pollen trap. Yes, pollen traps for top-bar hives. Moreover, the upper entrances also help ventilate the hive in winter. All the details are in my book, but for now appreciate that top-bar hive entrances are not just holes. Rather they are multifunctional “ports” strategically placed on the hive to achieve several goals to fully embrace keeping bees in a horizontal hive design.
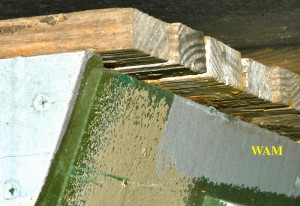
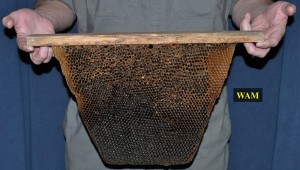
Another subtle but important design is that my top bars hang over the edge of the hive, not cut even with the sides of the hive. Once the comb attachments are cut (easy to do and explained in the book), I reach under the overhanging ends and easily lift up the top bar on my finger tips. My comb handling is done mostly on my finger tips where the combs naturally remain vertical (as they should). The close-up picture on the left below shows the overhang from a front corner of the hive. The picture on the right below shows how I hold a top-bar comb on my finger tips.
In the next picture, I have put the combs in the nuc box, set them aside, and removed a brood comb. In August the brood nest is getting smaller. I raise my own queens (from varroa resistant stock, which does not need chemical treatments), and this stock also responds to the summertime marginal foraging conditions by a decrease in brood rearing (called season sense). A mild sumac nectar flow has started (no comb production) so the bees just fill the empty brood cells with the unripe sumac honey. I had removed the first top-bar comb next to the entrances earlier in the summer and the bees did not rebuild it, leaving an easy way into the hive and clustering space for the bees right behind the entrances.
The next picture shows the hive inspection from above with the top bars described by the text, starting from the front (entrance end) of the hive. The first few top bars removed go in the nuc box to make a working space, a gap separating the inspected combs from those not yet removed. This is a easy, natural, and logical way to look through a colony, seeing the combs in order from the front to the back of the hive. What to look for, how to manage the colony through the season, and the numerous special management topics to help beekeepers flourish are detailed in the book.
Now putting this all together, standing upright (the hive stand) without lifting heavy honey stores (due to the entrance placement), I can easily open hives (entrance placement again) and check the brood combs handling the top bars on my fingertips (from the top-bar overhang). So when I need to work through some 80 top-bar hives in a day, working alone, all these factors make the work flow smoothly along with the precise surgical use of smoke applied at the right time and in the correct amount. This kind of beekeeping is quite pleasant even when working many hives.
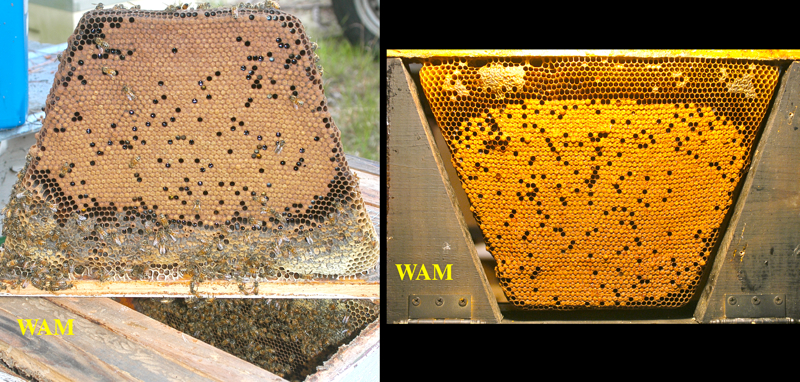
Now let’s look at some brood combs, The one on the left is upside-down over the working space. Once combs are strong enough (as defined in the book), they can rest on their top bars freeing up one’s hands (provided there is no wind that might blow them over). The comb on the right is in a special collapsible holder for photography (note the hinges at the bases). Both combs have good solid sealed brood patterns. The left one has a fairly good honey band. The right one lacks a sealed honey band, but the colony is in a spring nectar flow, and there is no concern for starvation.
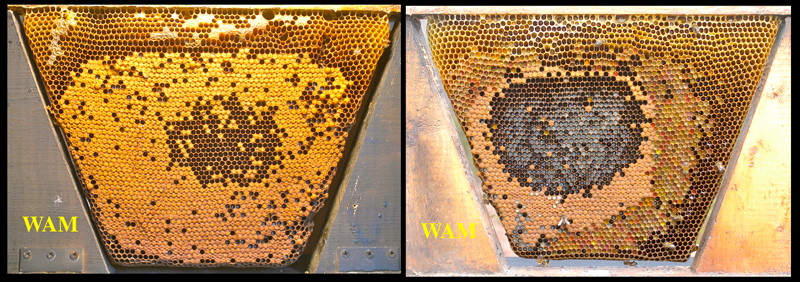
The next pair of brood comb pictures shows a pattern of emerging brood. The queen begins egg laying from the center of the comb to the edges. The left comb is empty in the center where the bees have emerged. The right comb has older larvae, appearing white, the next brood generation. A ring of sealed brood is around the larvae, which is the previous brood generation as yet to emerge. A pollen band surrounds some of the brood. With practice one can “read” brood combs, even their subtle details, and gain an understanding of what is happening in the hive. Notice my combs are straight to their top bars. Straight combs are interchangeable among my colonies for efficient bee management (no crooked comb problems or combs melting from overheating).
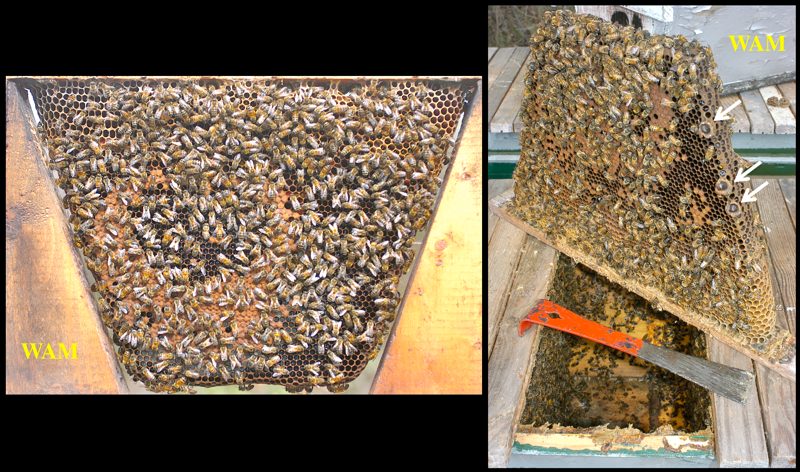
The next pictures show bees on the combs. With proper handling, the combs lifted out with the bees are hardly disturbed, which makes finding the queen much easier. In the right picture, I am checking queen cell cups (the arrows), which are typically built along the edges of the comb. To see if the queen cell cups are empty or if they contain eggs or young larvae, I have pushed back the cell walls so I can quickly see into the cells. Inverting the comb is a convenient way to free up my hands and closely check the comb. Also notice that only the bees on the removed comb and in the immediate inspection area are exposed. The rest of the colony is essentially undisturbed.
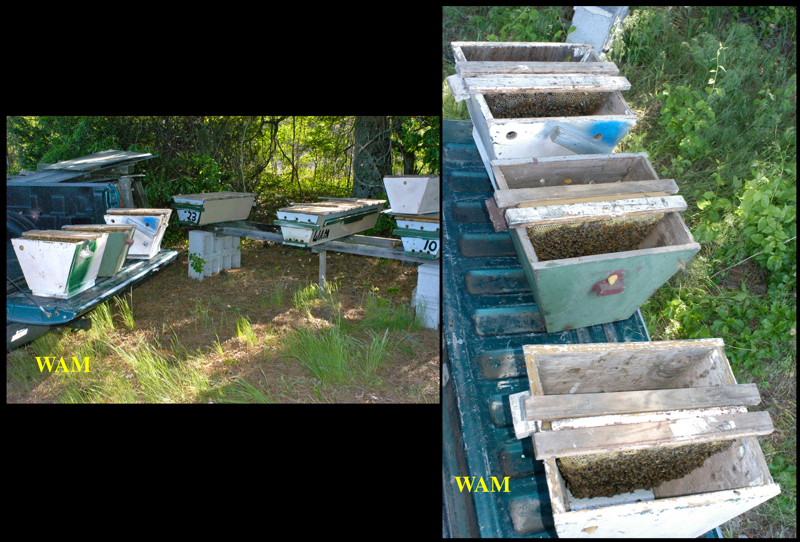
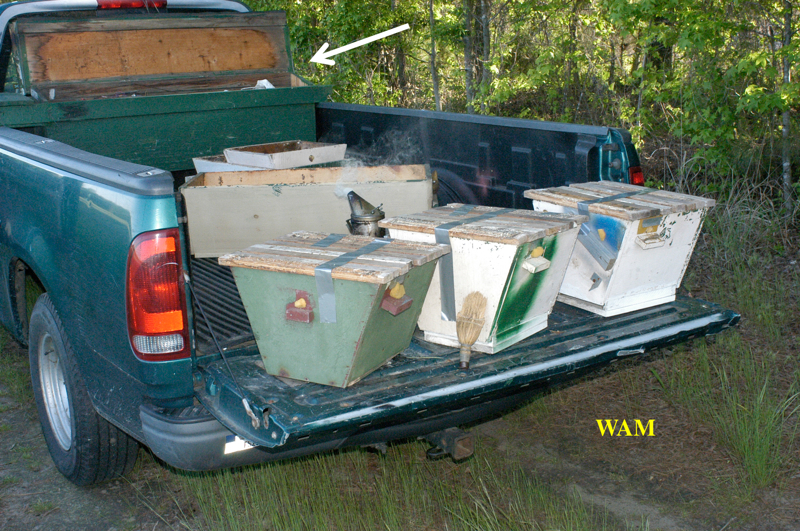
Making nucs is routine work in the spring. I give detailed procedures in the book for making them. Below I am making queen mating nucs, which are smaller nucs than a typical nuc for starting a full-size colony. Each one-foot nuc box has a center partition dividing the hive body into two compartments, one for each mating nuc. Each mating nuc can hold three top bars, but I usually just let it be a two-comb colony with the third top bar having just a small comb or no comb to make it easy to open the little hive. The book has a chapter on modifying queen production equipment to top-bar hives for either small scale production with no grafting or large scale by grafting. Also there are procedures on package bee production with top-bar hives, which can go with queen production. In the lowest nuc box on the right, the partition is seen separating the first installed combs of the two nucs. I work from the tailgate of the truck since its height is similar to the height of the stands.
The mating nucs are finished and ready to be loaded in the truck. I sweep off the pine pollen, which has settled on the top-bars in the spring with the whisk broom, so the tape will stick. The tape keeps the top bars in place during the drive to another location. I move the hives so the bees cannot go back to their old hive locations. If the bees will accept the queen cells, I attach them to the combs of the nucs now, rather than wait a day. If attached correctly, the queen cells will not fall out of the combs during the drive. How to do all of that is in my book. The sponges are acceptable to block mating nuc entrances on cool spring days for fairly short trips, but sponges not recommended during summer heat. My homemade toolbox (arrow) has all kinds of beekeeping tools when working our-apiaries, a mobile solution center.
To learn a complete system of beekeeping for top-bar hive beekeeping, please go back to the Welcome page to order the book. I hope you enjoyed looking over the pictures, and that they were instructive. I’ll add more pictures later. Kind Regards, Dr. W. A. Mangum, WAM.
